Discover easy and effective ways to fix imperfections on your walls and achieve a smooth, flawless finish.
This guide will provide you with step-by-step instructions and the tools you need to achieve a professional finish.
Say goodbye to cracks, holes, and uneven spots on your walls with these simple tips.

Identify and prepare the surface
Dealing with imperfections on your walls, such as cracks, holes, or uneven textures, is a common but manageable task.
Before beginning any repair work, it is essential to first identify the specific type and size of the imperfections.
For this first step, carefully inspect the affected areas, noting the extent and nature of the defects.
Whether you’re dealing with small cracks, larger holes, or extensive uneven surfaces, knowing what you’re up against sets the stage for a successful repair process.
Once you have a clear understanding of the nature of the imperfections, the next step is to properly prepare the surface.
Start by thoroughly cleaning the affected areas to remove dust, dirt, or old paint residue.
This not only ensures a clean work area, but also helps repair materials—such as putty or patches—adhere better to the wall.
The process of cleaning and preparing the surface lays a solid foundation for the subsequent repair and painting phases.
After cleaning, assess the condition of the surrounding areas to make sure they are suitable for repair work.
Look for any signs of moisture or underlying issues that may need to be addressed before proceeding with the repair.
In addition, gather the necessary tools and materials—such as body filler, sanding tools, and primer—so they are ready for the next steps in the repair process.

Smoothing out uneven wall surfaces
When it comes to correcting larger irregularities or rough spots on the wall, such as bumps or ripples, a more thorough approach is needed.
Applying a thin, even layer of spackling paste or a specialized plastering compound over the entire affected area is an effective way to level the surface.
Using a wide putty knife or trowel, carefully spread the compound, making sure to blend it into the surrounding wall to create a smooth, even surface.
After applying the leveling compound, let it dry completely before sanding the surface. This crucial step ensures that the wall has a smooth, professional finish, free of uneven textures or visible imperfections.
In some cases, it may be necessary to apply several coats of the leveling compound and sand thoroughly to achieve the desired results, especially in areas with significant unevenness.
Patience and attention to detail in this step are key to ensuring that the final wall surface is flawless.
Choosing the right paint for wall imperfections
As with any aspect of interior design, the choice of paint plays a significant role in the final look of a space.
When it comes to hiding imperfections on walls, choosing the right type of paint can make all the difference.
Matte or flat finishes are often recommended for hiding imperfections on walls, as they tend to absorb more light, minimizing the appearance of irregularities and giving the walls a more uniform look.
In addition to the finish, the paint color is another crucial consideration. Dark and neutral colors are particularly effective at hiding imperfections and creating a modern, cohesive look in any room.
It is important to choose a high-quality paint with good coverage, as this can reduce the number of coats needed and increase the overall durability of the finish.
In addition, paints with a slight texture can also help conceal minor imperfections and add visual interest to walls, striking a balance between practicality and aesthetics.
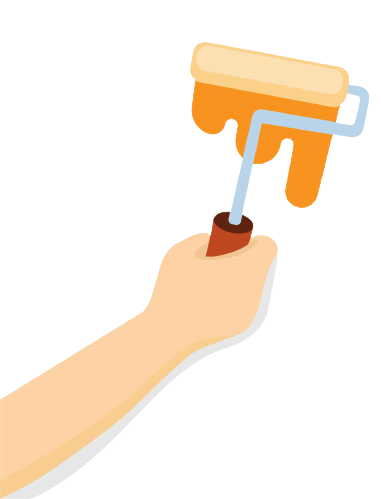
Application of the chosen paint
Applying the selected paint to the prepared wall surfaces is the final step in the process of concealing imperfections on the wall.
To ensure a smooth, even finish, use a high-quality paint roller—preferably one with a long-pile cover—to distribute the paint effectively and replicate the texture of the surrounding wall.
Start by applying a coat of paint to the repaired areas, blending it with the original wall to create a seamless transition and hide any visible signs of previous repairs.
Next, apply the paint to the rest of the wall, using the same technique to ensure a uniform texture and finish throughout the room.
You may need to apply several coats of paint to achieve the desired coverage, especially when using darker colors or those with higher pigment content.
Let each coat dry completely before applying the next one, ensuring a flawless, professional finish.
By following these steps and using the right techniques, you can effectively transform your walls and eliminate any visible imperfections, thereby enhancing the aesthetic appeal of your home.

Tips for a flawless finish
If you’re aiming for a flawless finish to hide imperfections on the wall, there are several key tips you should keep in mind.
First and foremost, patience is essential at every stage of the repair and painting process. Taking the time to meticulously prepare surfaces, allowing sufficient drying and curing time, and being thorough when applying the chosen products all contribute to a professional-quality finish.
In addition, investing in high-quality tools and materials—such as brushes, rollers, and top-quality fillers—can significantly affect how easy the application is and the overall finish.
In addition, keeping your workspace clean and organized, and protecting surrounding areas from paint splatters or stains, can help streamline the entire process and ensure a visually consistent result.
It is also advisable to work in well-ventilated areas and to be familiar with the recommended drying and recoating times for the specific products being used.
If you follow these tips and best practices, you’ll be able to improve your DIY skills and achieve a flawless, professional-looking finish that hides imperfections in your walls once and for all.
Essential tools and materials
Undertaking a wall repair and painting project requires a specific set of tools and materials to ensure a smooth and successful process.
Essential tools include a putty knife for applying the filler, fine-grit sandpaper or a sanding block for smoothing out the repaired areas, and a paint roller with an extension pole for effortless and even application.
In addition, having painter’s tape, drop cloths, and high-quality primer and paint in the finish and color of your choice is essential for achieving a professional and long-lasting result.
Other essential supplies include a vacuum cleaner or soft brush for cleaning the repaired areas, a clean, lint-free cloth for removing dust and debris, and a paint tray and liner to make applying the paint easier.
By gathering this comprehensive set of essential tools and materials, you’ll be able to tackle your wall repair and painting project with confidence, knowing that you’re well-equipped to address and conceal any imperfections and achieve a flawless finish.
Removal and disposal of wall fixtures
Before beginning the repair and painting process, it is essential to remove any items from the walls that might obstruct or interfere with the work.
This includes removing items from the walls, such as picture frames, mirrors, or shelves, and taking out nails, screws, or hardware from the walls.
In addition, it is advisable to cover or mask electrical outlets, light switches, and ventilation grilles to prevent paint or putty from seeping into these areas and causing damage or compromising the finish.
By clearing the walls of any obstructions and protecting vulnerable surfaces, you create a clean, unobstructed work environment that facilitates the smooth and precise execution of repair and painting tasks.
This meticulous preparation not only preserves the integrity of the wall surfaces but also ensures a professional, flawless finish once the walls are fully repaired and freshly painted, restoring the space to its former glory.
Drying and curing of the compound
After applying the chosen filler or putty to the imperfections on the wall, allowing it to dry and cure properly is essential to the success of the repair process.
Follow the manufacturer’s instructions regarding the recommended drying time, and resist the temptation to rush this essential step by using artificial heating methods.
Patience is key during the drying and curing process, as rushing it can lead to poor results and affect the long-term durability and appearance of the repairs.
Once the compound has dried completely, it is important to perform a final sanding to ensure a completely smooth and level surface.
This meticulous attention to detail sets the stage for a flawless, professional paint job, ensuring that the repaired areas blend seamlessly with the rest of the wall and are virtually undetectable.
By allowing the compound to dry and cure completely, and by applying a final smoothing touch, you’re taking a crucial step toward achieving flawless, long-lasting results when it comes to concealing imperfections on your walls and revitalizing your living spaces.
Surface identification and preparation
Fixing imperfections in walls, such as cracks, holes, or uneven textures, is a common and manageable task.
Before starting any repair work, it is essential to first identify the specific type and size of the imperfections.
For this first step, carefully inspect the affected areas, noting the extent and nature of the defects.
Whether you’re dealing with small cracks, larger holes, or extensive uneven surfaces, knowing what you’re up against sets the stage for a successful repair process.
Once you have a clear understanding of the nature of the imperfections, the next step is to properly prepare the surface.
Start by thoroughly cleaning the affected areas to remove dust, dirt, or old paint residue. This not only ensures a clean work area but also helps repair materials—such as spackle or patches—adhere better to the wall.
The process of cleaning and preparing the surface lays a solid foundation for the subsequent repair and painting phases.

Repair cracks and holes
For minor cracks and imperfections, applying a suitable wall putty or joint compound is usually the most effective way to repair them.
Using a putty knife, carefully apply the compound to fill the cracks, making sure to press the material firmly to remove any air pockets and create a smooth, even surface.
For larger holes or areas of damage, it is advisable to use mesh or adhesive tape to reinforce the wall before applying the compound, providing added strength and preventing it from cracking or crumbling in the future.
Once you’ve applied the filler to the cracks and holes, let it dry thoroughly. After it’s dry, gently sand the repaired areas with fine-grit sandpaper to create a smooth, even finish that matches the rest of the wall.
The key is to ensure that the repaired areas are flush with the rest of the wall and free of any visible imperfections, so that the wall will have a professional-looking finish once it is painted.
Smoothing uneven wall surfaces
When it comes to correcting larger irregularities or rough spots on the wall, such as bumps or ripples, a more thorough approach is needed.
Applying a thin, even layer of spackling paste or a specialized plastering compound over the entire affected area is an effective way to level the surface.
Using a wide putty knife or trowel, carefully spread the compound, making sure to blend it into the surrounding wall to create a smooth, even surface.
After applying the leveling compound, let it dry completely before sanding the surface. This crucial step ensures that the wall has a smooth, professional finish, free of uneven textures or visible imperfections.
In some cases, it may be necessary to apply several coats of the leveling compound and sand thoroughly to achieve the desired results, especially in areas with significant unevenness. Patience and attention to detail during this step are key to ensuring that the final wall surface is flawless.
What’s the best way to fill cracks in a wall?
The best option is to use putty or filler. Apply it with a putty knife, making sure to fill the crack completely, let it dry, and then sand it down to smooth the surface before painting.
What type of paint is best at covering up imperfections?
Paints with a matte or soft-satin finish are the most recommended, as they do not reflect light and help hide imperfections such as unevenness or small dents.
How do you smooth out a wall with a lot of unevenness?
Apply a coat of plaster or leveling compound over the entire surface. Then sand it carefully until you achieve a smooth, even finish that’s ready to paint.
Is it necessary to use primer before painting?
Yes, primer improves paint adhesion, evens out the surface’s absorbency, and helps achieve a more durable and professional finish.
What tools do I need to repair walls?
The basic tools are:
Putty knife
Sandpaper or sanding block
Putty or repair paste
Paint roller and brush
Primer and paint
With these items, you can repair most household imperfections.