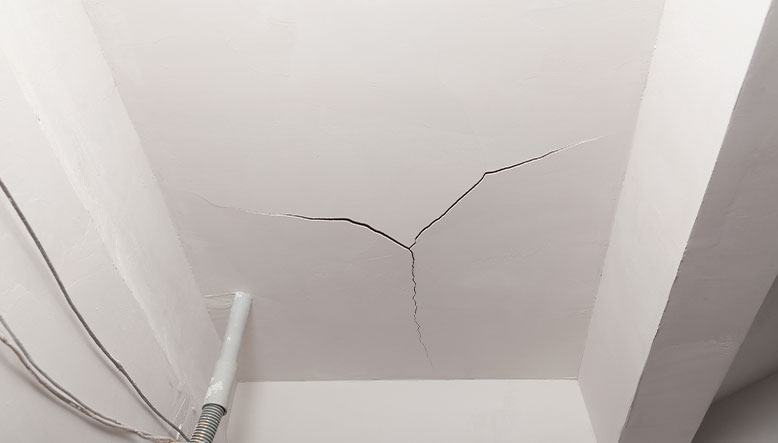
Cracks in the ceiling are one of the most common problems in buildings and a constant source of concern for homeowners. In addition to their obvious aesthetic impact, these cracks can indicate structural stresses, thermal expansion of the building, or deficiencies in the bonding materials. Addressing this problem involves more than just superficially concealing the damage; it requires applying a technical treatment that absorbs microvibrations from the substrate to ensure a durable finish.
At Paratureforma, we know that one of the most common mistakes in DIY and home masonry projects is limiting the repair to simply applying putty to the crack. If you simply fill the existing gap, the natural settling of the house and temperature changes will cause the crack to reopen in a short time. To achieve a professional and permanent result, it is essential to reinforce the joint using fiberglass mesh or tape, which distributes surface stresses and prevents mechanical stress from causing the plaster to crack again.
Below, we outline the step-by-step methodology, the specific materials, and the masonry tools needed to permanently repair cracks in the ceiling.

1. Types of Cracks: Preliminary Diagnosis
Before beginning any repair or patching work, it is essential to assess the nature of the crack to rule out major structural problems that would require the assistance of a specialized technician.
- Surface cracks or micro-shrinkage cracks: These affect only the paint layer or the thin plaster finish (< 1 mm wide). They are caused by rapid drying of the material or by the buildup of old layers of paint.
- Dynamic or settlement cracks: These cracks are between 1 mm and 3 mm wide and usually occur at the joints between hollow blocks and joists or at the seams between drywall panels. They are the most likely to reopen if a reinforcement strip is not used.
- Structural cracks: These have an opening wider than 3 mm, distinct diagonal or stepped patterns, and may be accompanied by bulging or spalling. In these cases, you should consult a technician before applying any decorative covering.
2. Tools and Materials Needed
To perform a repair that will last, it is necessary to use materials that provide adequate adhesion and flexibility:
- Stainless steel spatula with a flexible blade: 5 cm for scraping and 15 cm or longer for spreading.
- Beak scraper or triangular scraper: For opening a “V”-shaped crack.
- Fiberglass mesh or bandage (self-adhesive or synthetic): A key structural reinforcement element to prevent reopening.
- Filler putty and finishing putty: Or, if those are not available, a slow-drying, elastic joint compound.
- Water-based acrylic primer or fixative: To strengthen the worn surface and regulate absorption.
- Medium-grit (P100–P120) and fine-grit (P180–P220) sandpaper: Use a sanding block or a wall sander with a dust collection system.
- Painters’ tape and protective plastic sheeting: To cover the floor and furniture.
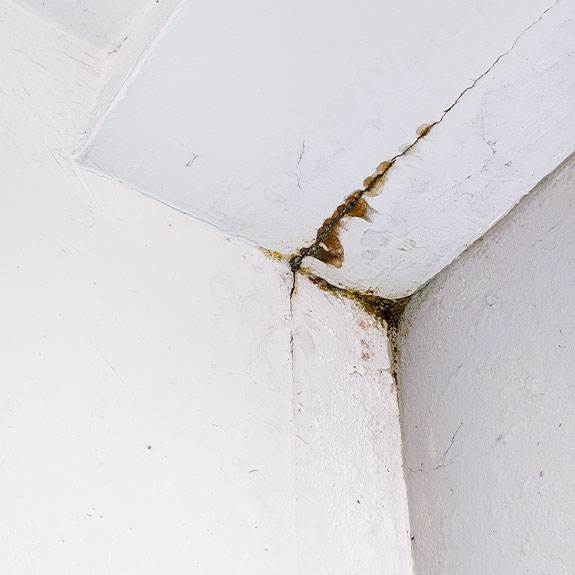
3. Why Doesn’t Putty Alone Work?
Understanding the physics of horizontal building surfaces is key to avoiding recurring repairs. Roofs are subject to temperature fluctuations (expansion and contraction), vibrations caused by traffic on the floors above, and slight settlement movements of the structure.
When cracks in the ceiling are filled exclusively with conventional putty or spackle, a rigid material is introduced at a point where there is a concentration of stress. As soon as the building undergoes a new thermal cycle or expands, the putty will give way at its weakest point, and the crack line will reappear on the painted surface.
The incorporation of the fiberglass mesh acts as a reinforcement that absorbs and distributes tangential energy throughout its entire structure. Just as reinforced concrete combines the strength of steel and cement, the fiberglass mesh mechanically holds the two edges of the wall in place, ensuring that the final installation remains completely stable and uniform.
| Repair Using Only Putty | Repair Using Fiber Mesh |
| Rigid, non-elastic filling Reopens due to temperature changes Low short-term durability High risk of detachment | Harmonic stress distribution Mechanical crack locking Permanent and durable solution Stable and flexible support |
4. Step-by-Step Guide to Filling Cracks in the Ceiling
Follow these technical instructions carefully to permanently repair the cracks in your ceiling.
Step 1: Opening and Beveling the Crack (Repair)
Using a triangular scraper or the tip of a stiff putty knife, open up the crack along its entire length. You must remove all loose material, weakened plaster, and layers of paint that are not adhering properly. Shape the groove into a “V” or an inverted dovetail, with a depth of approximately 3 to 5 mm. This will provide a larger bonding surface for the filler material.
Step 2: Cleaning and Priming the Channel
Thoroughly clean the dust inside the crack using a soft brush or a vacuum cleaner. Next, apply a coat of water-based acrylic primer or sealer to the inside of the crack using a small paintbrush. This step is essential to neutralize any residual dust, seal the porosity of the old plaster, and prevent it from suddenly absorbing water from the putty, which would cause premature drying and poor adhesion.
Step 3: Initial filling with slow-drying putty
Once the primer is dry, prepare the filler according to the water ratios specified by the manufacturer. Using a small putty knife, work the paste across the crack, pressing firmly to ensure the product penetrates all the way to the bottom of the “V”-shaped void. Leave the surface slightly recessed (about 1 mm) relative to the general plane of the ceiling so that the mesh can be applied later without creating a visible bulge.
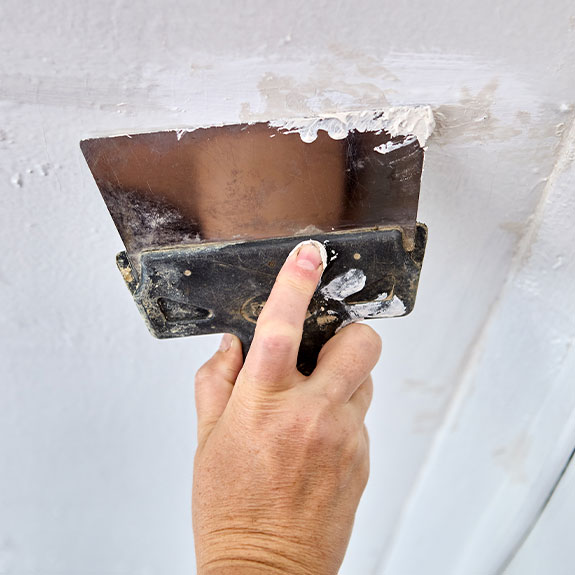
Step 4: Applying the fiberglass mesh or bandage
Before the filling material begins to set (or immediately afterward if you are using self-adhesive mesh directly over the filled and dried cavity):
- Unroll the fiberglass tape along the longitudinal axis of the crack.
- Press the tape down with a clean putty knife to embed it in the filler or adhere it firmly to the plaster.
- Make sure the mesh is perfectly taut, with no folds, wrinkles, or trapped air pockets.
Step 5: Laying the Topcoat and Leveling It
Using a wide trowel (15 to 20 cm wide), apply a thin layer of finishing putty over the fiberglass mesh. The goal of this step is to completely cover the mesh weave and gradually taper the edges toward the sides (about 10 cm on each side of the crack) to conceal the repair so that it is not visible to the naked eye.
Step 6: Sanding, Inspection, and Painting
Allow the product to dry for the time recommended by the manufacturer (usually between 12 and 24 hours, depending on the humidity). Once it has fully cured:
- Sand the surface with a fine-grit sanding block (P180 or P220), using gentle circular motions and without applying excessive pressure so as not to wear down the mesh.
- Run your hand over the repaired area to make sure the transition between the repair and the original ceiling is imperceptible to the touch.
- Fahren Sie mit der Hand über die reparierte Stelle, um sicherzustellen, dass der Übergang zwischen der Reparaturstelle und der ursprünglichen Decke beim Berühren nicht spürbar ist.
5. Empfehlungen zur Wartung und Vorbeugung
Um nach Abschluss der Maurerarbeiten einen optimalen Erhalt des Daches zu gewährleisten:
- Vermeiden Sie während des Aushärtens direkte Zugluft: Eine zu schnelle Trocknung aufgrund übermäßiger Belüftung oder starker Heizung kann zu Rissen in den dünnen Schichten der Spachtelmasse führen.
- Verwenden Sie atmungsaktive Farben: Entscheiden Sie sich bei Decken in Badezimmern oder Küchen für Kunststofffarben mit hoher Wasserdampfdurchlässigkeit und fungiziden Zusätzen, um zu verhindern, dass Kondenswasser den Putzschicht schwächt.
- Dichten Sie die Ränder ordnungsgemäß ab: Befindet sich der Riss an der Fuge zwischen Decke und Wand, ersetzen Sie das starre Netz durch eine Raupe aus elastischem, überstreichbarem Acryl-Dichtstoff, der speziell dafür entwickelt wurde, Dehnungen in Ecken aufzufangen.
Fazit
Um Risse in der Decke dauerhaft zu verschließen, reicht ein rein ästhetischer Putz nicht aus. Die Kombination aus einer korrekten „V“-förmigen Abschrägung, der Verwendung von Spachtelmasse und vor allem der strategischen Anbringung eines Glasfasergewebes als flexible Armierung gewährleistet, dass die Reparatur den baulichen Bewegungen und thermischen Veränderungen des Hauses standhält, ohne dass sich der Riss erneut öffnet.
Im Online-Katalog von paratureforma finden Sie alle Maurerwerkzeuge, Edelstahlspachtel, selbstklebende Glasfaserbandagen, Verfestigungsgrundierungen und technische Spachtelmassen, die Sie benötigen, um die Sanierung Ihrer Decken und Wände mit professionellen und langlebigen Ergebnissen durchzuführen.
Warum reicht es nicht aus, das Dach nur mit Kitt zu reparieren?
Conventional putty is a rigid material. Due to thermal expansion and natural settlement of the building, this rigidity will give way at the weakest point, and the crack will quickly reappear on the surface.
What exactly is the purpose of fiberglass mesh or bandage?
It functions like a frame that absorbs and distributes mechanical stress throughout its entire structure. By securing both edges of the wall, it ensures that the structure remains stable, flexible, and durable.
How should I prepare the crack before applying the filler?
First, use a scraper to open up the “V”-shaped crack (about 3 to 5 mm deep). Then, thoroughly clean out the dust and apply an acrylic primer to seal the pores and ensure the putty adheres properly.
How can I tell if the crack is superficial or a serious structural problem?
Surface cracks are less than 1 mm wide. If the crack is wider than 3 mm, has distinct diagonal patterns, or is accompanied by spalling, it is a structural crack that should be inspected by a specialist.
What precautions should I take while the repair is drying?
It is essential to avoid direct drafts and high heat during the curing process. If the surface dries too quickly, the final layer of finishing putty may crack.