A range hood is an essential component for maintaining air quality, hygiene, and the durability of finishes in any kitchen.
Its main function goes beyond eliminating odors generated during cooking: it traps airborne grease and removes excess moisture that would otherwise condense on walls, furniture, and ceilings, causing mold growth and premature deterioration of surfaces.
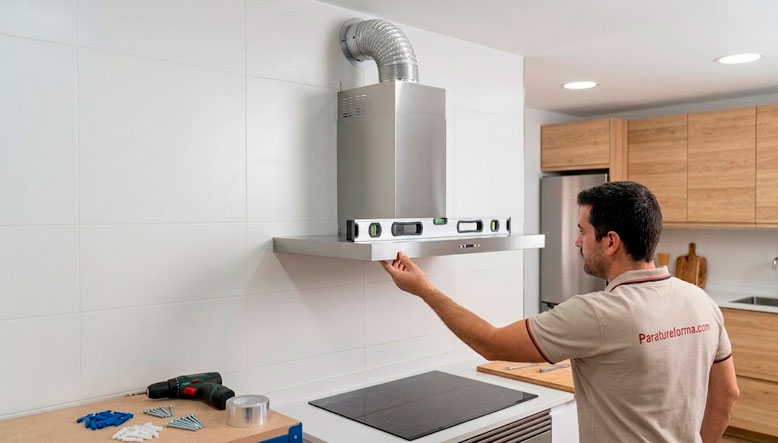
Based on Paratureforma.com’s technical expertise, installing this equipment requires a combination of geometric precision, knowledge of wall mounting techniques, and proper sealing of the exhaust ducts. Proper installation of a range hood involves ensuring a solid mechanical anchor and unobstructed airflow through the ductwork to optimize the motor’s energy efficiency.
Below, we present a detailed, step-by-step guide for professionally and safely installing a wall-mounted range hood with an outdoor vent.
1. Technical Planning and Verification of Prerequisites
Before beginning any installation or drilling work, it is essential to verify that the work area complies with the technical specifications required by the manufacturer and with building codes.
1.1. Ergonomics and Safe Distance
The height at which the base of the range hood should be positioned relative to the cooktop is a critical factor for safety and efficiency:
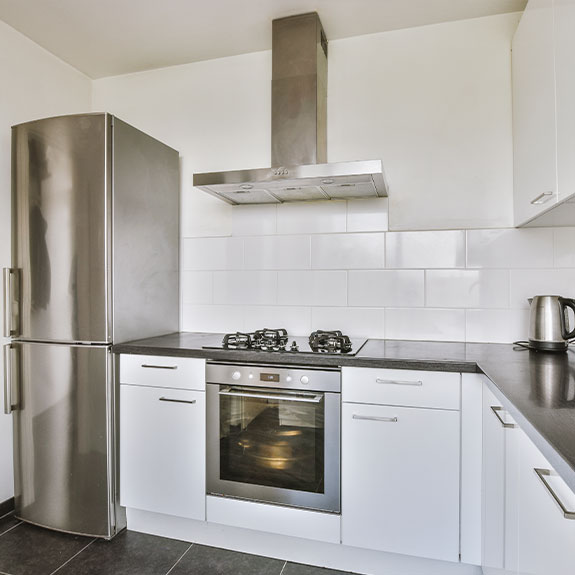
- Induction or glass-ceramic cooktops: The recommended minimum vertical clearance ranges from 65 cm to 70 cm.
- Gas stoves: Due to the presence of an open flame and increased radiant heat, the minimum distance must be increased to 75 cm.
Installing the range hood too low poses a fire hazard due to the buildup of hot grease in the filters, while installing it too high will drastically reduce the unit’s suction capacity.
1.2. Diameter of the flue outlet
Check the diameter of the existing wall vent. In residential installations, pipes with a diameter of 120 mm or 150 mm are standard. It is essential that the flexible or rigid exhaust pipe match the diameter of the range hood’s outlet; reducing the diameter with adapters causes pressure drops, increases noise levels, and overloads the motor.
2. Tools and Materials Needed
To ensure a flawless installation, make sure you have the following tools on hand before you begin:
- Range hood or decorative wall-mounted hood.
- Hammer drill and set of masonry/tile drill bits.
- High-strength nylon expansion anchors (8 mm or 10 mm).
- Galvanized steel screws for heavy-duty fastening.
- Corrugated aluminum flexible tubing or rigid, fire-retardant PVC conduit.
- Metal worm-type clamps for sealing pipes.
- High-adhesion aluminum insulation tape for joints.
- Spirit level, measuring tape, and carpenter’s pencil.
- Duct tape and a rubber mallet.
3. Laying Out and Marking the Anchor Points
Accuracy in the initial layout prevents visual misalignments and ensures that the equipment is perfectly aligned with the cooking area.
Step 1: Drawing the vertical axis
Locate the exact center of the cooktop on the wall. Using a spirit level and a long ruler, draw a vertical line that serves as an upward axis of symmetry. This line will guide the center of the range hood and ensure that the trim or telescopic chimney is vertical.
Step 2: Marking the Lower Boundary and Template
Measure the appropriate safety distance from the glass-ceramic or gas cooktop and draw a horizontal line across the vertical axis. Position the paper template provided by the manufacturer (or the hood’s own rear frame) so that the marks align with the centerline and the base height.
Step 3: Marking Holes
Use a pencil to mark the center of the main suspension points and the secondary safety mounting holes.
4. Drilling into the Wall and Selecting Anchors
Range hoods are appliances subjected to constant vibrations caused by the rotation of the motor unit. For this reason, the choice of fasteners and the drilling procedure are critical.
| Wall Type | Recommended Drill Bit | Technical Mounting Bracket |
| Ceramics / Tiles | Tungsten carbide drill bit | 8–10 mm Nylon Expansion Anchor |
| Solid brick or block | Standard masonry drill bit | Fischer DUOPOWER Universal Anchor |
| Drywall Partitions | Metal drill bit (without a hammer mechanism) | Metal expansion anchor (Molly) |
Step 1: Drilling a Hole in a Tile Without Cracking It
Place a piece of masking tape over the pencil marks. The tape prevents the drill bit from slipping on the glazed surface of the tile. Turn off the hammer function on the drill and start drilling at low speed until you have completely drilled through the ceramic tile.
Step 2: Drilling into the support wall
Once you have cut through the tile, switch to hammer drill mode if the wall is made of brick or concrete, and continue drilling until you reach the required depth for the anchor. Remove any dust from inside the hole by blowing it out or vacuuming it up.
Step 3: Inserting the Correct Anchors
Insert the flush expansion anchors into the tile surface by tapping them gently with a rubber mallet. For hollow walls or drywall partitions, install the metal umbrella anchors using the appropriate riveting pliers to distribute the weight across the back of the panel.
5. Mechanical Assembly of the Hood Frame
With the anchors in place in the wall, proceed to attach the wall brackets and the main body of the range hood.
- Mounting the suspension brackets: Screw in the supplied upper metal brackets or hooks, making sure they are securely fastened to the wall.
- Mounted on the frame: With the help of another person, lift the main body of the range hood and fit its rear slots onto the previously leveled mounting brackets.
- Leveling adjustment: Most modern mounts feature a micrometer adjustment screw that allows you to correct minor horizontal deviations. Adjust until the bubble in the level is centered.
- Safety fastening: Insert the safety screws into the lower holes in the chassis and secure them in the support blocks to prevent the hood from shifting unintentionally if it is accidentally moved upward.

6. Connecting the Flexible Flue Pipe
The range hood’s aerodynamic performance depends directly on the quality of the air duct installation. Improper installation of the exhaust duct can result in airflow losses and grease leaks inside the cabinet or drop ceiling.
Step 1: Installing the check valve
Install the butterfly valve or check valve at the hood’s outlet (above the motor). This valve prevents cold outside air or odors from the building from entering when the range hood is turned off.
Step 2: Connecting the aluminum hose
Take the corrugated aluminum hose and gently straighten it out to remove any unnecessary kinks. A kinked hose causes turbulence and substantially increases air friction noise.
- Insert the end of the tube into the threaded neck of the check valve.
- Place a metal worm clamp around the neck and tighten it with a screwdriver until the tube is secured.
- Reinforce the joint by applying technical-grade aluminum adhesive tape around the entire perimeter of the joint to ensure an airtight seal.
Step 3: Connecting to the wall vent or chimney
Run the other end of the flexible hose to the wall outlet. Avoid sharp bends or 90° angles along the route, as each sharp bend reduces suction performance by approximately 10%. Connect the hose to the wall outlet or duct and reseal the joint with a clamp and metal electrical tape.
7. Electrical Connection and Installation of the Trim Piece
Before working on the electrical system, turn off the main circuit breaker in the home’s electrical panel.
- Power Connection: Plug the range hood’s power cord into a Schuko-type outlet installed inside the trim area. If the installation involves a direct connection to a terminal block, follow the color coding: brown/black (live), blue (neutral), and yellow/green (ground).
- Functionality Check: Connect the electrical panel and operate the exhaust fan at its various speeds. Verify that the suction is adequate, that the built-in lights turn on correctly, and that there are no unusual vibrations or air leaks at the joints of the aluminum duct.
- Assembling the telescoping chimney: Slide the stainless steel trim sleeves over the hood body all the way to the ceiling. Secure the top trim plate to the ceiling using lightweight anchors, and screw in the side trim pieces.
Final Conclusion
Learning how to install a range hood in a systematic way is an accessible advanced DIY project that dramatically improves the thermal comfort, hygiene, and health of your home.
The combination of a proper choice of anchor point using technical expansion anchors, precise alignment with the cooking surface, and a leak-tight installation of the flexible flue pipe ensures maximum motor durability and the permanent elimination of condensation and impurities in the air.
In the Paratureforma.com online catalog, we carry all the hardware supplies, specialized drill bits, heavy-duty anchors, flexible hoses, clamps, and specialized tools needed to successfully renovate or install a range hood.
At what exact height should the range hood be installed above the stovetop?
For induction or glass-ceramic cooktops, the minimum distance should be between 65 and 70 cm. If you have a gas cooktop, you should raise it to 75 cm to avoid risks from heat and direct flames.
How can I drill into the wall without breaking or cracking the tiles?
The trick is to place a piece of masking tape over the pencil mark so the drill bit doesn’t slip. Use a tungsten carbide drill bit at low speed and turn off the hammer function until you’ve gone through the enamel.
What kind of wall anchors do I need to hang the range hood?
It depends on your wall. For tile or solid brick, use high-strength nylon expansion anchors (8 to 10 mm). If your wall is made of drywall (gypsum board), you must use metal umbrella-type expansion anchors (Molly).araguas (Molly).
What is the purpose of a check valve, and where is it installed?
It is installed at the exhaust opening of the range hood, just above the motor. Its purpose is to prevent cold drafts from the street or unpleasant odors from the building from entering when the range hood is turned off.
How should I position the exhaust hose so I don’t lose suction power?
The flexible aluminum hose should be stretched gently to prevent kinks that cause noise. In addition, you should avoid installing very tight elbows or 90° angles, since each sharp bend reduces suction capacity by about 10%.