Interior design is an art form that constantly seeks the perfect balance between aesthetics and functionality. In the quest to create spaces that convey warmth, history, and character, the rustic style has established itself as one of the most timeless and sought-after trends. Traditionally, achieving this look required significant investment and complex architectural work involving heavy structural elements. However, at Paratureforma.com, we know that innovation in building materials has changed the game. Today, the ultimate solution for transforming your home in a stunning way is to install faux polyurethane beams.
Throughout this in-depth article, we invite you to discover how this extraordinary material can elevate the design of your rooms. We’ll explore not only the undeniable architectural beauty it brings, but also its surprising practical advantages, highlighting its unprecedented lightness and its ingenious ability to solve common problems with ceilings in any home.
The Magic of Rustic Style in Modern Architecture
The charm of a country house, the grandeur of an old farmhouse, or the warmth of a mountain cabin—all these spaces share an architectural element that draws our gaze upward: exposed wooden beams. These elements add an unparalleled visual texture, breaking up the monotony of smooth ceilings and giving the room a sense of refuge and solidity.
However, solid wood presents significant logistical challenges. Its heavy weight requires ceilings designed to withstand extreme structural loads, its price is often prohibitive for tight budgets, and its installation requires heavy machinery and highly specialized labor. In addition, natural wood is susceptible to attack by wood-boring insects, such as termites, and to drastic changes in humidity and temperature.
This is precisely where contemporary materials technology comes into play to offer us a brilliant alternative. Installing faux polyurethane beams allows us to capture all that essence and visual elegance, while completely eliminating the structural and economic drawbacks of natural wood.
Why Choose Polyurethane for Your Roofs?
At Paratureforma.com, we carefully select the materials we offer our customers, and high-density polyurethane is undoubtedly one of the smartest and most versatile options on the market today for ceiling decoration.
Unmatched Lightness That Inspires
The most fascinating feature of polyurethane beams is their astonishing lightness. It is truly inspiring to hold with just one hand a piece several meters long that, at first glance, looks like a century-old oak log. This feature makes interior design accessible to everyone; it is no longer necessary to rely on a team of strongmen or complex lifting cranes.
Thanks to its lightweight nature, installing polyurethane false beams becomes a viable option for ceilings that couldn’t support the weight of real wood, such as drywall or plasterboard drop ceilings. This structural freedom allows you to give free rein to your creativity, designing spectacular trusses, coffered ceilings, or simple parallel lines that visually lengthen your living room, without fear of compromising the structural integrity of the building.
The Best-Kept Secret: Clever Ways to Hide Cables and Pipes
Beyond their obvious aesthetic value, polyurethane beams hold a secret that makes them the perfect choice for smart renovations: they are hollow inside. This “U”-shaped design provides a longitudinal channel that is invaluable in modern architecture.
It is very common to encounter unsightly electrical installations, network cables, plumbing pipes, or air conditioning ducts that run across ceilings and ruin the visual harmony of a space. Cutting grooves into the ceiling to conceal them creates debris, dust, and considerable expense.
The most elegant and ingenious solution is to use these beams as decorative moldings. By strategically placing faux polyurethane beams over these installations, you’re not only hiding a technical issue but also transforming a flaw in the space into the room’s main decorative feature. It’s the ultimate expression of smart design: where there used to be a PVC pipe running across your kitchen ceiling, there now stands a majestic, rustic-looking beam that adds character and distinction.
Amazing Realism and Resilience
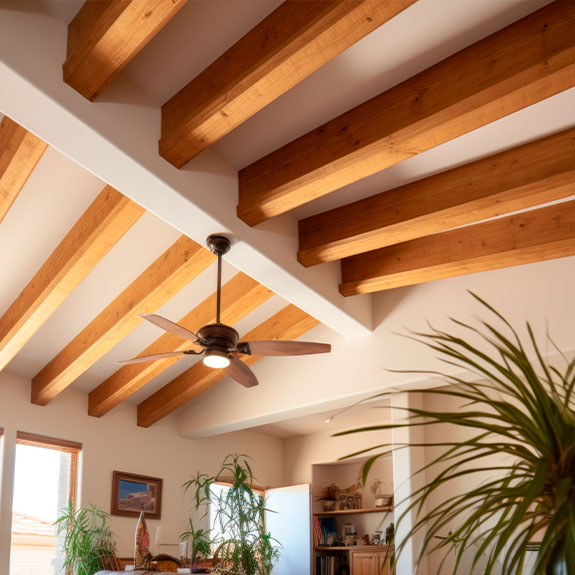
Today’s manufacturing processes use molds cast from genuine antique wooden beams. The result is a material that reproduces the grain, knots, cracks, and textures of different wood species with millimeter-level precision. Once installed on the ceiling, it is virtually impossible to distinguish them from real wood, even at close range.
In addition, polyurethane is a highly durable polymer. It is waterproof, so it does not rot or develop mold in humid environments (such as bathrooms or kitchens); it does not expand or contract with temperature changes; and it is completely resistant to insect infestations.
Preparation: Tools and Materials Needed
To complete this project with professional-quality finishes, you will need the following items (all of which are available in the Paratureforma.com catalog):
- Polyurethane faux beams in the selected style and color.
- Extra-strong mounting adhesive (specifically for polyurethane and polystyrene).
- Fine-toothed saw or hand saw.
- Tape measure, set square, and pencil.
- A bubble level or laser level and a straightedge.
- Touch-up paint (stain) in the same color as the beams to hide the joints.
- Wooden dowels (optional, for the mechanical fastening method).
Step-by-Step: How to Successfully Install Polyurethane False Beams
Installing these items is a clean and rewarding process. By following these steps carefully, you’ll achieve a spectacular result that will transform the atmosphere of your home.
1. Ceiling Planning and Design
Before applying any adhesive, planning is essential. Carefully measure the length and width of the ceiling. Decide on the orientation of the beams (placing them across the width makes the room appear wider, while placing them along the length visually elongates it). Calculate the exact spacing between each beam to ensure symmetry. Use a laser level and a chalk line to mark the exact path on the ceiling where each piece will be installed.
Design Note: If your primary goal is to use the beams to conceal existing utilities (such as cables or pipes), the design should logically follow the path of those utilities.
2. Custom Cut
Take precise wall-to-wall measurements. Since walls are rarely perfectly square, measure each section individually. When cutting the beam with the fine-toothed saw, cut firmly but without applying excessive pressure to achieve a clean cut. Polyurethane cuts as easily as butter, which once again highlights just how inspiring and easy this material is to work with.
3. Applying the Mounting Adhesive
For a purely chemical bond, apply a generous bead of high-quality mounting adhesive along the two top edges of the beam (the ones that will be in contact with the ceiling). Be sure to use an adhesive with very high initial tack.
Alternative Method (Combined Fastening): If the ceiling is uneven or the beams are very wide, you can first screw small wooden blocks into the ceiling (within the marked area) and, after applying the adhesive to the beam, fit it over the blocks and secure it laterally with small headless nails to hold it in place while the glue dries.
4. Ceiling Installation
Lift the beam (keeping in mind how light and easy to handle it is) and align it with the marks made by the straightedge on the ceiling. Press firmly along the entire surface so that the adhesive makes full contact. If the initial-grip adhesive is of good quality, the beam will hold on its own almost immediately. However, for very long pieces, it may be helpful to use some lightweight supports for a couple of hours.
If you are concealing wires, make sure the electrical wiring is completely tucked into the interior cavity of the beam before pressing it against the ceiling, taking care not to pinch the wires.
5. Finishes, Sealing, and Joints
The real secret to a professional finish lies in the final details. If you’ve had to join two beams lengthwise, or at the joints with the wall, small gaps may remain. Use filler to cover these imperfections. Once the filler is dry, use a fine brush to apply the specific stain or touch-up paint (the same color as the beam) to the joints.
Another highly aesthetic solution for concealing joints is decorative faux-wrought-iron trim. These strips of flexible polyurethane or rubber mimic the look of antique iron and are glued around the beam joint, covering the cut and adding an extra touch of rustic authenticity.
Inspiring Ideas for Different Rooms
The versatility of installing faux polyurethane beams allows them to be incorporated into a wide variety of decorative settings:
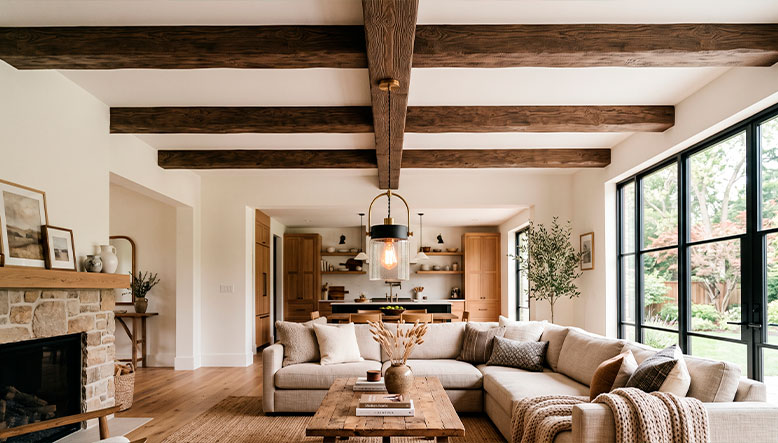
- In the Living Room: This is the perfect space. A ceiling with dark beams contrasting with pure white walls creates a very elegant modern “farmhouse” look. You can use the central beams to route the wiring for a spectacular chandelier or ceiling fans right in the center of the living area, without a single wire in sight.
- In the Kitchen: They add a cozy touch that invites you to spend time with your family. If you have a kitchen island, installing a pair of parallel beams right above it helps to visually frame the space.
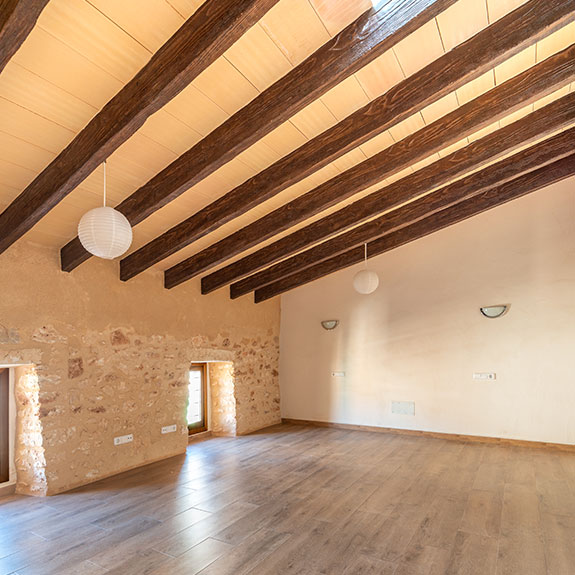
- In the Bedroom: A sloped ceiling lined with light-colored beams (imitation distressed pine or white oak) creates a romantic, Provençal, and deeply relaxing atmosphere, ideal for rest.
Conclusion: The Aesthetic Revolution Is Within Your Reach
In short, contemporary interior design offers us wonderful tools that allow us to achieve aesthetic excellence without the major sacrifices involved in traditional construction. Installing faux polyurethane beams is a clear example of how materials engineering serves design and well-being.
The ability to transform a nondescript ceiling into a majestic rustic roof, combined with the ability to skillfully conceal the unsightly elements of our installations, makes these beams a brilliant, long-lasting, and tremendously inspiring investment for any homeowner.
Are you ready to give your home that rustic, elegant, and warm touch you’ve always dreamed of—in the simplest and most efficient way possible? We invite you to visit the Paratureforma.com online store, where you’ll find the most comprehensive selection of high-quality polyurethane beams, specialty adhesives, and accessories—so you can start transforming your spaces today.
Why choose polyurethane beams instead of natural wood?
Polyurethane is an ultralight material that is more economical and does not require structural work. In addition, it is waterproof, does not expand, and is completely resistant to pests such as termites.
Are false beams useful for hiding cables or pipes from the ceiling?
Yes, this is one of its biggest benefits. Its hollow, U-shaped interior serves as a decorative channel that’s perfect for concealing electrical and plumbing installations or conduits without having to cut grooves.
Can these beams be installed in plasterboard or stucco drop ceilings?
Absolutely. Thanks to their lightweight design, they can be safely installed on lightweight roofs that could never support the structural load required by a solid wood beam.
What do I need to install polyurethane beams at home?
The process is very simple; all you’ll need is an extra-strong adhesive with immediate bonding, a fine-toothed saw, a tape measure, a level, caulk, and touch-up paint for the joints.
How can I hide the joints if I have to splice two beams together?
You can fill the joint with putty and conceal it with a stain of the same color. As a rustic and very attractive alternative, you can use flexible faux-wrought-iron strips or hardware that are glued directly over the joint.